Installing a Split Rail Fence
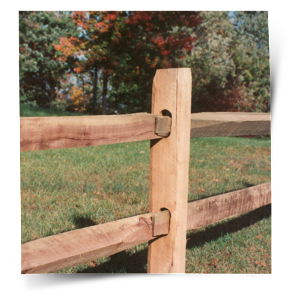
 Installing a split rail fence is a great way to border your property in a charming, simple way. And although it may seem like a simple process, there’s more than meets the eye. Below we detail the process we use when installing this type of fence. You’ll see that it takes more than a keen eye and a hammer… Before we begin it’s important to note a few things. When planning a fence installation, we must make sure it fully on your property and not your neighbors. We also need to check local ordinances to make sure everything is in-line with your town/city government. Lastly, we call 888-DIG-SAFE to check for underground utilities. Once we get the green light on the above, we start to plan the dig. Here’s a list of materials/products we use.
- Post digger
- Carpenters level
- Shovel
- Measure
- End posts
- Line posts
- Corner posts
- Fence rails
- Gravel
- Stakes
- String
The initial planning of a fence is very important – one small mistake and the entire project would have to be redone. We start by laying out your fence first to get a good idea of where it will go. Here’s an example of how we measure to find the perfect fit for your new fence: If we’re building a 33 ft fence and your split rails are 11 ft long, you would divid the initial length by 11 to see how many “sections” you would have. Now we can start digging! Using a shovel and post hole digger, we dig a hole that’s about 10 inches in diameter. We then fill it with a little bit of gravel to drain any moisture. This is a very important step and one that isn’t followed by a lot of contractors trying to cut corners. As you probably know, water can damage wood very easily. Therefore it is important to drain away any moisture quickly and easily. By adding gravel/rocks, we can ensure that the water goes into the ground rather than pooling around the wood post and damaging it. Next we use the level to make sure the squared up. After we’re sure the post is square, we set it. It’s during this part of the project we like to check our work and make sure everything has been done perfectly. Now we move on to the final stage in this installation, adding the rails. Once the rails are added, we check our work one more time and let you inspect the entire fence to make sure it is 100% to your liking. There are a few details we left out but for the most part (such as the steps to digging the perfect post hole) that is how we install your split rail fence. For a more in-depth look at the entire process, here’s a great tutorial by the folks over at Popular Mechanics or feel free to watch the video below. http://www.youtube.com/watch?v=CHwg0GevCCQ Interested in having your fence installed by Anello Fence, LLC? Give us a call today! Often times, when installing a split rail fence we work with Reynolds Fence.

 Here at
  Installing a new fence in NJ requires a lot of planning. Lucky for you, Anello Fence has been designing and